
How to Choose the Right Safety Lockout Devices

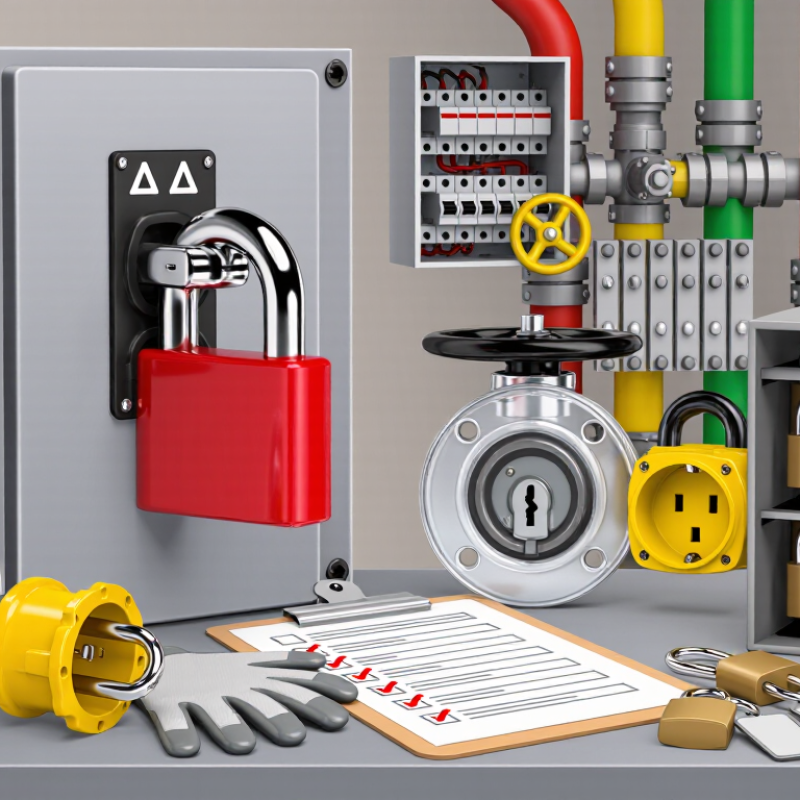
Choosing the right Safety Lockout devices is a practical step in controlling hazardous energy during equipment maintenance. A red padlock on a control switch may look simple, but the correct choice depends on the machine, energy source, and task. Electrical panels, valves, plugs, and moving parts each require compatible devices. A lock that does not fit securely can create confusion at the worksite.

Start by identifying every energy source connected to the equipment. Consider electricity, hydraulic pressure, compressed air, heat, and stored mechanical force. Then check whether each isolation point can accept a lockout device and remain clearly visible. For example, a valve cover should resist tampering without blocking nearby controls. A breaker lock should fit the specific breaker design, not merely look close enough. Small differences matter.

Good selection also depends on people. Devices should be durable, easy to recognize, and practical for workers wearing gloves. Labels need clear names and space for essential details. Where several workers share a task, group lockout equipment may help keep responsibility visible. Training and written procedures support the hardware; neither can replace the other. That part is sometimes underestimated.

There is no universal kit. Review the equipment, consult its manufacturer information, and involve qualified safety personnel before purchasing devices. Test fit when appropriate, and inspect devices for wear or damage. A checklist helps, but it can still miss an awkward valve or a hidden energy source. Pause and verify. The right Safety Lockout setup is the one that matches the actual equipment and supports a clear, consistent process.
How to Choose the Right Safety Lockout Devices

Understanding the Purpose and Scope of Safety Lockout Devices

Safety lockout devices isolate hazardous energy before maintenance begins. They prevent a machine from starting unexpectedly or releasing stored electrical, mechanical, hydraulic, or pneumatic energy. A lock on a disconnect switch is only one part of the process. A complete setup may also need valve locks, hasps, tags, and devices for blocking gravity-driven parts. OSHA estimates that effective lockout/tagout practices protect nearly three million workers and prevent about 120 fatalities and 50,000 injuries each year. These figures, reported by the U.S. Occupational Safety and Health Administration, show why device selection must match the hazard—not just the machine’s appearance.

Define the scope by tracing every energy source to its point of isolation. Check equipment drawings, inspect the work area, and ask the people who service the machine where energy can remain trapped. A tag communicates danger, but it does not physically stop a switch from moving. A lock does. Verify isolation by testing controls and checking for residual pressure or motion before work starts. Small details matter. A valve handle may look secured while a second feed line remains open. I have seen planning focus on the obvious disconnect and overlook stored energy in a raised component; that is an easy assumption to make, and a useful one to challenge. U.S. OSHA’s Control of Hazardous Energy standard and guidance provide a reliable basis for defining these procedures.

How to Choose the Right Safety Lockout Devices

Lockout/tagout follows a sequence: identify and isolate hazardous energy, apply suitable devices, control stored energy, then verify isolation before work begins.

Choose devices that physically secure the specific energy-isolating points on the equipment—for example, breaker lockouts for compatible circuit breakers and valve lockouts for compatible valves. Follow the equipment-specific procedure and applicable regulations.

Identifying Hazardous Energy Sources and Isolation Points

How to Choose the Right Safety Lockout Devices

Identifying Hazardous Energy Sources and Isolation Points

Choosing a lockout device starts with a careful walk-through, not a catalog. Trace every energy source feeding the equipment: electrical circuits, hydraulic lines, compressed air, steam, gravity, and stored spring tension. A conveyor may be switched off but still hold a raised load or pressurized air. Check drawings against the machine itself; older equipment may not match its paperwork.

OSHA reports that effective lockout/tagout can prevent an estimated 120 fatalities and 50,000 injuries each year. That figure makes thorough energy identification more than a paperwork exercise.

At each isolation point, confirm whether the device can physically secure the control in its safe position. A breaker may need a suitable breaker lockout; a valve may require a cover or cable device. Note secondary feeds, shared piping, and energy that can rebuild after shutdown. Verify isolation using the site’s established procedure, and have an authorized worker check the equipment before servicing. OSHA’s Control of Hazardous Energy guidance emphasizes controlling all hazardous energy, including stored energy. In practice, the overlooked source is often the one closest to the task.

Tips: Mark each isolation point on a simple diagram. Test for zero energy; do not rely on a dark display or silent motor. Recheck the plan when equipment changes. It’s easy to miss one.

Matching Lockout Devices to Equipment and Energy Types

A safety lockout device should fit both the equipment and the energy it controls. For an electrical disconnect, use a lockout that holds the switch in the off position and prevents access to its operating handle. Check the enclosure and handle dimensions before choosing a device; a close fit matters. Then apply a personal lock and verify that the equipment cannot start.

Different energy sources call for different controls. A ball valve may need a clamp that blocks the handle from turning, while a gate valve may need a cover sized to enclose its handwheel. For pneumatic or hydraulic lines, select a device suited to the coupling or isolation point, and relieve stored pressure according to the equipment procedure. Mechanical hazards can require blocking or restraint, not just a lock on a nearby power source.

Fit is only part of the decision. Consider heat, moisture, vibration, and whether workers can see the locked point during a handover. A device that works on a clean test bench may be awkward in a cramped plant room. That is worth rechecking. Match each device to the isolation point, label it clearly, and have trained workers test the isolation before maintenance begins.

Checking Device Compatibility, Durability, and Compliance

Choosing a safety lockout device starts with the equipment it must secure. Check the energy-isolating point’s shape, size, and movement before selecting a device. A valve handle may need a different cover than a breaker toggle. Measure the opening and test the fit while the equipment is safely isolated. The device should prevent operation without blocking nearby controls or creating a snag hazard. A fit that looks close is not always a safe fit.

Durability matters in daily use. Inspect the body, hinge, and locking points for cracks, corrosion, or looseness. In a damp washdown area, materials must tolerate moisture and cleaning agents; outdoors, they may face sunlight and temperature changes. Try the device with the gloves workers actually wear. Small details count. I have seen a sturdy device become awkward when its label rubbed off or its hasp was difficult to reach. That is easy to overlook.

Check that the device supports your site’s lockout procedure and applicable safety requirements. Confirm how many personal locks it accepts, whether its labels remain readable, and whether workers can identify the isolation point clearly. Keep inspection records and replace damaged devices promptly. Requirements differ by equipment and location, so verify choices with a qualified safety professional. Compatibility is not a one-time guess; review it when equipment or work conditions change.

Establishing Procedures for Use, Inspection, and Storage

How to Choose the Right Safety Lockout Devices

Establishing Procedures for Use, Inspection, and Storage

A suitable lockout device must fit the energy source and the equipment’s isolation point. A valve cover, breaker lock, and cable device serve different purposes. Match each device to the machinery, then document its application in a clear, equipment-specific procedure.

OSHA estimates that effective lockout/tagout practices prevent about 120 fatalities and 50,000 injuries each year. That estimate underscores why procedures need to work on the shop floor, not just on paper.

Keep instructions near the equipment. Include shutdown steps, energy-isolation points, stored-energy controls, and a method for verifying isolation. Short steps help. So do clear labels.

Train authorized workers to apply and remove devices, and make inspection part of routine use. Check for cracks, worn cables, illegible tags, or locks that no longer secure firmly.

OSHA’s Control of Hazardous Energy standard requires periodic inspections of energy-control procedures, at least annually. Record findings and correct problems promptly.

Storage matters, too. Keep devices clean, dry, and organized in a designated cabinet or board, with damaged items separated from ready-to-use equipment. A missing device can disrupt a job; a poorly stored one may be overlooked.

Procedures are never perfect. Ask workers where steps feel unclear, then revise them when equipment or tasks change.

Source: OSHA, Control of Hazardous Energy (Lockout/Tagout), 29 CFR 1910.147.

Translate